How to Draw a Puppy
Learnhow to draw a puppy!I'll show you how to draw a mischievously cute Cavalier King Charles Spaniel.
This drawing lesson explains the drawing techniques that I used to create this cute puppy drawing.
For this puppy drawing, I used a set ofGeneral's Kimberly Drawing Pencils(this links to Blick Art Materials, and if you make a purchase I get a small commission that helpssupport this site). The set that I used contained 10 pencils, ranging from very soft to very hard. This is a great range to have for doing drawings.

The particular pencil drawing set that I used had pencils ranging from 8B (very soft) to 4H (very hard). The set of 10 also included a handy eraser and a sharpener.
Please note that you don't have to useallof the pencils in a set when you learn how to draw a puppy. I probably only used 4 of the different pencils in this puppy drawing.
Ready to get started?
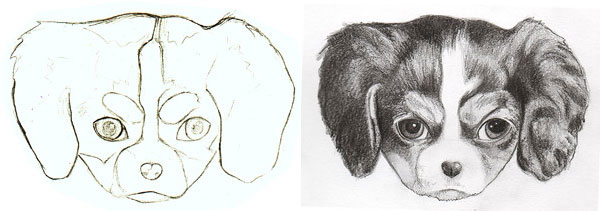
Here is the cute puppy that I used a model for my drawing. Doesn't she look a bit cheeky? I really wanted to capture that mischievous glimmer in her eye. This gorgeous puppy belongs toJelene, who gave her permission for me to use her puppy photo as a reference for teaching you how to draw a puppy!

Cute little thing, isn't she?

Let's Begin!
I decided to focus on just the head of this darling dog for my drawing. I started by drawing the outline of the puppy, as well as her main features. I also drew light pencil marks to indicate the areas of lighter and darker color.
(Please note that at this stage, the drawing is actually very light. It only looks dark here because I had to darken it digitally, so that you could see the lines!)
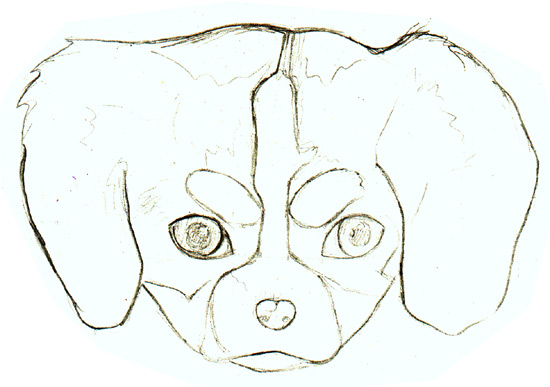
To draw the outline, I used a very hard 4H pencil.The harder the pencil, the lighter the line will be. At this stage, you want to draw everything in very lightly, so that you can easily erase mistakes and adjust proportions.
Drawing Tips:
When drawing a puppy, I start with the eyes. I make sure that they are proportionate to one another. Then I draw the nose, again checking that everything is in the right place.
WIth the eyes and nose in place, it's now easier to lightly draw the outline of the head, the ears and the mouth.
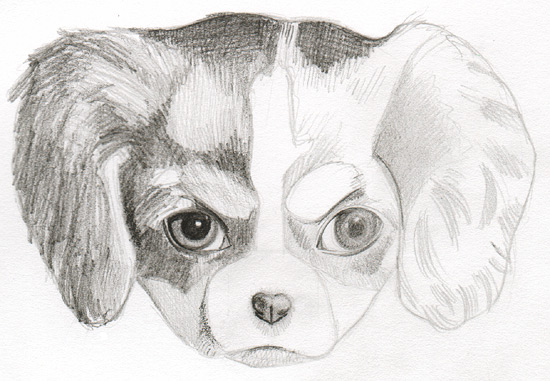
Next I started shading, using anHBpencil for the mid-tones and a2Bpencil for areas that are just darker:
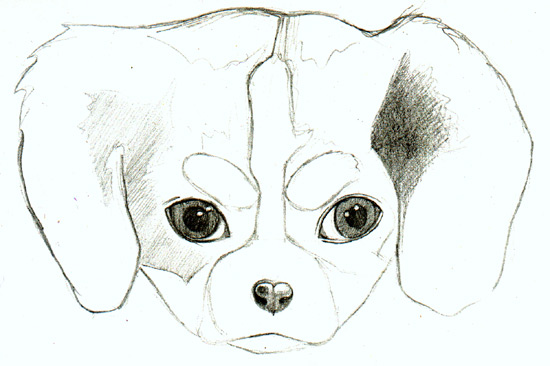
I like to work on the eyes and the nose right away, so that I can get a "feel" for how the puppy drawing will look. To make the pupils really dark, I use a6Bpencil.
I would advise only using a6Bpencil when you are really ready to make something look dark though, because if you press hard, the6Bpencil marks will be hard to erase if you make a mistake!
Next I start lightly shading in the other areas that will be dark. I start off lightly, using soft, light pencil strokes in a combination of hatching and cross-hatching.
As you can see, at this stage I work fairly quickly. I don't worry about perfection. My main goal is to just get down an idea of where the dark and light patches are.
Drawing Tip:
Sometimes when we work on a drawing, we get frustrated or discouraged if the drawing doesn't look how we want it to look right away. Don't worry about this! Drawing is a process, and it takes time. Most artworks look weird when they're "in progress". This is normal, and everything will fall into place the more you work on the drawing.
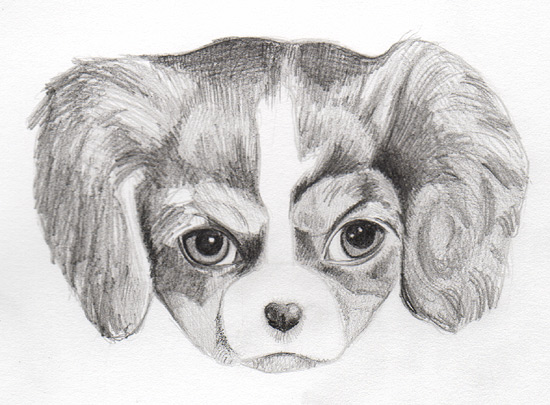
Here you can see how I've mapped out the dark and light areas through a combination of hatching and cross-hatching, using a2Hpencil:
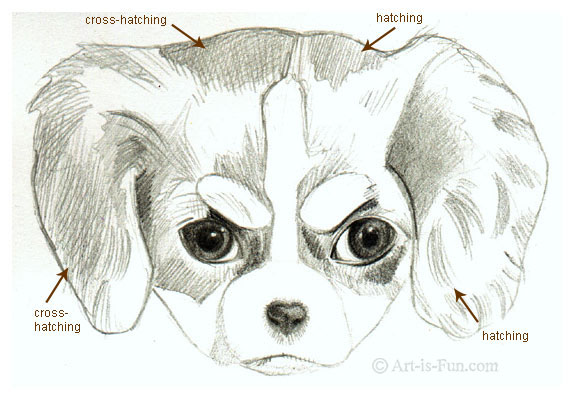
在孵化时,我通常试图让李nes go in the direction of the fur. I use a pencil that is slighter softer than the pencil I used previously, resulting in a darker line. So after using a2Hpencil, for example, I then use anHBpencil to help make the shading even darker.
In the picture above you can see how I go in with an even softer pencil to draw even darker lines. Compare the left side with the right side to see the difference. The right side is all2H, and the left side isHBon top of2H.
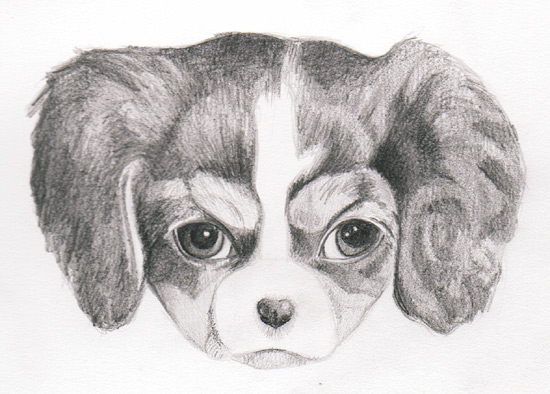
I also adjusted the shape of the inside of the eyes, because they were too small.
Now I've done the right side with theHBpencil and the puppy drawing is really starting to take shape. She is beginning to look 3-dimensional!
Drawing Tip:
记得把你的线的方向the fur.
Although sometimes, for darker areas, it is effective to cross-hatch in opposite directions than the fur.
Now I use a very soft6Bpencil to make very dark marks. Rather than hatching or cross-hatching, in which the pencil is lifted after each stroke, I now use a smooth back-and-forth motion.
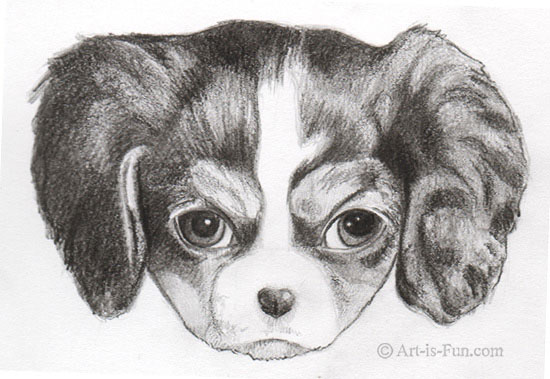
And here she is, the finished puppy drawing! I think I managed to capture that adorably naughty expression. What do you think? Now that you know the basics steps for how to draw a puppy, you can practice making lots of puppy drawings!
Please note that at this point your puppy drawing can get easily smudged. (You may have even noticed this while you were working on it!) If you'd like to protect your puppy drawing for longevity, spray it with a finalsealantthat prevent smudging and fading. Sealants also ensure protection against UV rays and moisture. The sealant that I use for my drawings is calledKrylon Crystal Clear.
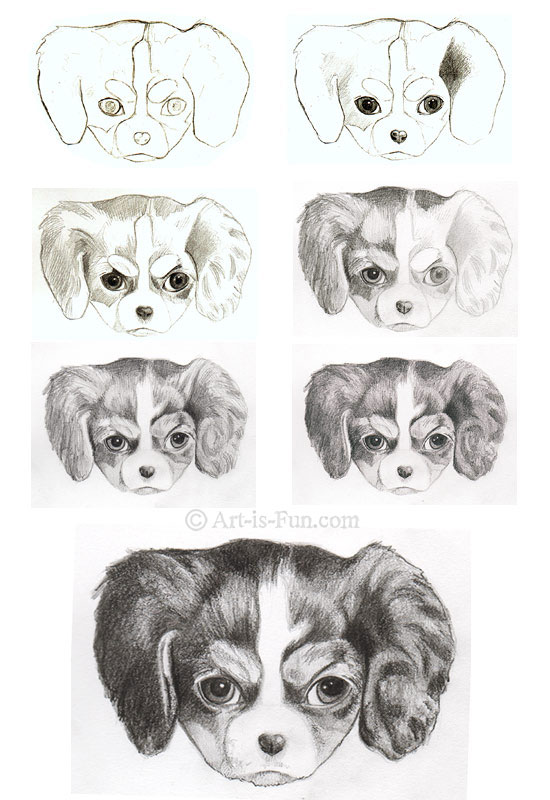
Here are all the steps on how to draw a puppy, in an easy-to-view format:
If you need an easier lesson on drawing dogs, click here to learnhow to draw a dogin a fun cartoon style.
Check out theDrawing Lessonspage for more fun drawing art lessons!

Let’s Draw Course
Check out my in-depth review of theLet’s Draw Course!You’ll learn how to draw landscapes, animals, and more from experienced instructors who teach in a fun, step-by-step manner!


